
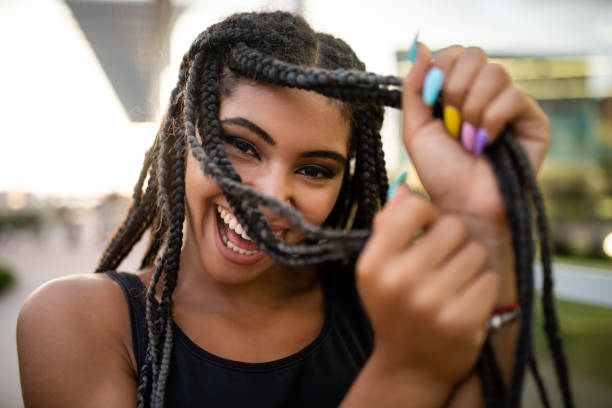
(ThyBlackMan.com) Come here for a minute. Sit down. Take a breath.
Before there were salons on every corner, before YouTube tutorials, before booking apps and price lists, Black women learned how to braid hair the old way. We learned by watching. By listening. By sitting on the floor between somebody’s knees while hands moved with purpose and patience. Braiding was never rushed. It was never casual. It was care. It was conversation. It was love passed from hand to head.
Learning how to braid your own hair is not just about saving money or convenience. It is about independence. It is about knowing how to tend to yourself when nobody else is around. When you braid your own hair, you slow down. You pay attention. You learn how your scalp feels, how your strands move, where your hair needs gentleness and where it can take strength.
I am writing this as a Black woman hairstylist who learned by doing, by messing up, by redoing parts, by taking breaks when my arms burned, and by refusing to give up. There is nothing fancy about this guide. This is old school teaching. Step by step. No rushing. No shortcuts. Just real hands on knowledge meant to stay with you.
Step 1 – Prepare Your Mind and Your Space
Before you touch one strand, you need to understand something. Braiding is work. It is hand work. It is eye work. It is patience work. The reason people get frustrated is because they start braiding like they are trying to hurry and get somewhere. But braiding your own hair is the destination. It is the ritual.
Start by choosing your spot. A dining room chair is better than the bed, because you need your back straight and your elbows supported. If you are hunched over for two hours, your hands will cramp and your parts will start looking like a map after a storm.
Lighting matters. Old school salons had bright bulbs for a reason. If you cannot see your scalp clearly, your parts will be crooked and you will be guessing. Put a lamp close, or sit near a window in daytime.
Mirrors are your best friend. If you have only one mirror, you will end up twisting like a pretzel trying to see the back. The classic setup is one mirror in front of you and a second mirror behind you, or a handheld mirror you can lift. That way you can check the back without panic.
Then do one more thing people forget. Clear your area. Lay out your combs, clips, hair ties, gel, spray bottle, and oil. When your hair is sectioned and you stop to hunt for a comb, that is when parts puff up, strands tangle, and you lose your rhythm.
Step 2 – Start With Clean Hair
Clean hair is obedient hair. Dirty hair is rebellious hair. I’m not even trying to be funny. Product buildup, sweat, lint, and old gel create friction and tangles. That makes braiding harder and makes your scalp itch later.
Wash your hair with purpose. Do not just rub shampoo on top and call it a day. Part your hair into sections even in the shower if you need to. Use the pads of your fingers and scrub your scalp gently. Think of it like washing your face. You want circulation, not scratches.
Rinse thoroughly. If shampoo stays in your hair, it will dry it out. Then follow with conditioner. When you put conditioner in, detangle right there. Start at the ends. Work up slowly. That is old school rule number one. If you rip through your hair from the roots, you are inviting breakage.
When you finish, squeeze water out gently. Do not rough towel your hair like it is a rag. Use a t shirt or microfiber towel if you have it. The goal is less frizz, less tangles, more control.
Step 3 – Deep Condition and Moisturize
This is where you decide if your braids will feel soft and healthy, or dry and stiff.
If your hair tends to feel dry, do a deep conditioner for at least 15 to 30 minutes. Put on a plastic cap. If you want to go old school, wrap a warm towel around your head. Heat helps the conditioner do its job.
After you rinse, you need moisture that stays. That means leave in conditioner first. Work it through with your fingers, then comb gently.
Then you seal. A little oil or butter on the ends helps lock moisture in. Not heavy, not greasy. Just enough to keep your hair from feeling like straw.
And listen. Moisturizing is not about making hair wet. It is about making hair flexible. Braids last longer when your hair can bend without snapping.
Step 4 – Stretch Your Hair Gently
Stretching is not about making your hair straight to please somebody. Stretching is about making it easier for your hands to manage your hair so your parts can be clean and your braids can be even.
If you braid on very shrunken hair, your sections will look small at first and then puff up, and your braid may get tight as it dries. That can lead to tension on the scalp.
You have options.
You can blow dry on low heat with a comb attachment. Use heat protectant. Move slowly. Do not cook your hair. Just stretch it.
You can band your hair. That means you section your hair and put hair ties down the length to stretch it as it dries. This method is gentle and old school.
Or you can do chunky braids or twists and let your hair dry overnight. When you take them down, your hair is stretched without heat.
The best stretching method is the one that keeps your hair healthy and makes it easy for you.
Step 5 – Gather Your Tools
Tools do not make you a stylist, but the right tools make the job smoother.
Rat tail comb. This is your parting weapon. A wide tooth comb is not going to give you straight lines. A rat tail comb will.
Clips or clamps. You need something that can hold thick hair without slipping. Those little baby clips will not cut it on a full head.
Spray bottle. Even if you stretched your hair, sections can dry out while you work. A light mist helps you control the hair without soaking it.
Braiding gel or edge control. This is for smoothing. Not for turning your hair into cement. Look for something that does not flake easily.
Hair ties. Choose ones that do not snag. Old school trick is to rub a little oil on the band so it slides off later.
Oil for scalp and finishing. Light oil is better than heavy grease for most people, but do what your scalp likes.
And one more tool. A towel or cape around your shoulders. Gel, oil, and loose hair will end up on your shirt if you do not protect yourself.
Step 6 – Section Your Hair Properly
Sectioning is where beginners get lazy, and it shows.
Start by dividing your hair into four big parts like a cross. From forehead to nape, and ear to ear. Clip each section away neatly.
Now work one quadrant at a time. Do not open the whole head at once. That is how hair tangles and you start feeling overwhelmed.
Decide your braid size. If you want medium braids, your parts need to match that. If you want big chunky braids, your parts can be bigger.
Old school rule. Your parts should be clean, and your sections should be controlled. If hair from another section is creeping in, clip it away. A clean base gives you clean results.
If you are doing simple braids without extensions, you can do fewer, larger sections. If you are trying smaller braids, you need more time and more precision.
Step 7 – Apply Product at the Roots
This is not the step where you drown your hair in gel. This is the step where you smooth and prepare.
Take a small amount of gel or edge control on your fingertip. Rub it between your fingers first so it spreads easily. Then apply it at the root of your section. Use the comb to smooth it down.
The purpose is to lay flyaways and help your braid look neat. The product should not be so thick that your hair feels sticky.
If you notice flaking later, it usually means you used too much product or mixed products that do not agree. Keep it simple.
Step 8 – Divide the Hair Into Three Equal Strands
This is where braids either look balanced or lopsided.
Split the section into three strands as evenly as possible. If one piece is thicker than the others, the braid will lean and look uneven.
Use your fingers like a measuring tool. Feel the thickness. Look at it. Adjust if needed.
Now find your grip. I teach clients to hold the braid close to the scalp with the thumb and index finger, while the other fingers manage the strands. But everybody’s hands are different. The key is control.
Do not let the strands tangle together. Keep them separated like three lanes on a road.
Step 9 – Begin the Braid Motion Slowly
Old school teaching says start slow, finish clean.
Cross right strand over middle.
Then cross left strand over middle.
Repeat.
The biggest mistake is rushing and losing track of which strand is which. When you go slow, your fingers learn the pattern.
If you keep getting confused, pause. Reset the strands in your fingers. There is no shame in stopping. Better to stop than to braid wrong for three inches and have to unravel.
Also, keep your hands close to your scalp at the start. That helps you anchor the braid and keeps it neat.
Step 10 – Maintain Even Tension
Tension is a skill. Too loose and the braid slips. Too tight and your scalp screams.
You want firm enough that the braid holds, but gentle enough that your scalp feels comfortable.
Old school test. After you start braiding, lightly touch the base. If it feels sore immediately, loosen up. If it feels like it might slip, tighten slightly.
Another tip. When you braid your own hair, you tend to pull harder because you cannot feel the tension the way you would on someone else. So always remind yourself to relax your grip.
Your edges are not meant to be pulled into submission. Protect them.
Step 11 – Braid Down the Length of the Hair
Once you have the base, the rest is rhythm.
As you braid, keep the strands smooth. If a strand starts to fray or tangle, pause and smooth it with your fingers.
Try to keep the braid consistent. Do not start tight and then go loose. That makes the braid look uneven and can cause it to unravel.
If your hands get tired, stop and shake them out. Old school stylists took breaks too. They just did it when nobody was looking.
Step 12 – Secure the Ends
Ends are fragile. Treat them like delicate fabric.
If your hair naturally coils at the end, you may be able to braid down and twist the ends with a little product so they stay.
If you use a hair tie or band, do not wrap it ten times. That creates a tight knot that can break your ends when you remove it.
Wrap it just enough to hold.
If you are braiding with extensions, you would usually dip the ends in hot water to seal, but since we are talking about braiding your own hair in general, securing the ends depends on whether it is natural hair only or added hair.
Step 13 – Repeat Across Your Head
This step is where discipline comes in.
Work section by section. Finish one quadrant, then move to the next. Do not jump around the head unless you have a plan.
Keep checking your mirror. The back of your head is where people get sloppy because they cannot see. That is why you set your mirrors up earlier.
If a part looks crooked, redo it. The old school way is to fix it now, not regret it later.
Step 14 – Take Breaks When Needed
Braiding your own hair is a workout. Your arms will tell you that.
Take breaks every few braids if you need to. Stretch your neck. Roll your shoulders. Open and close your hands.
Drink water. Yes, water. You cannot do detailed work when your body is running on fumes.
If you feel frustration rising, pause. Braiding while irritated leads to tight braids and rough handling. We are not punishing our hair.
Step 15 – Finish and Seal the Style
When the braids are done, do not just throw a bonnet on and forget about it.
Lightly oil your scalp. Massage gently. That wakes up circulation and keeps dryness away.
If you like mousse, you can apply a little to reduce frizz. Wrap your hair down with a scarf for 10 to 15 minutes to set it.
Then check the whole style. Look at the front. Look at the sides. Look at the back. Fix anything that is obviously uneven.
Old school stylists always did a final inspection, even on themselves.
Step 16 – Care for Your Braids
A style is only as good as the care after.
Moisturize your scalp every few days. Use a light spray, then seal with oil if needed.
Sleep with satin every night. Cotton steals moisture and creates friction.
Do not keep braids in so long that your hair starts matting at the roots. When you see a lot of shed hair trapped, that is your sign it is time.
And when you take braids down, be gentle. Detangle patiently. Cleanse your scalp. Deep condition again. That is the cycle of healthy hair.
When the last braid is done and your hands finally rest, take a moment. Look at your head. Not for perfection, but for effort. For patience. For care. Braiding your own hair teaches you more than technique. It teaches you discipline. It teaches you respect for your body. It teaches you that you are capable of tending to yourself with the same love you would give someone else.
Some days your braids will be neat and sharp. Other days they will be a little uneven. That is alright. Hair, like life, is learned through repetition. Every time you sit down to braid, your hands remember more. Your confidence grows. Your connection to your hair deepens.
Old school women understood this. They knew hair was not just something to style. It was something to honor. When you braid your own hair, you are continuing that tradition. You are choosing care over rush. Knowledge over dependency. Patience over frustration.
Take pride in that. Wrap your hair at night. Moisturize your scalp. Listen to your strands. And when you sit down again to braid, know that you are not just styling hair. You are practicing self respect.
Staff Writer; Jada Moore
This sister is a talented hairstylist dedicated to helping Black women understand, care for, and confidently style their own natural hair.
She can be contacted at JadaM@ThyBlackMan.com.
